
Contents
Did you know that 50% of the air circulating inside your home comes up directly from your basement or crawl space? If that space is damp, musty, or poorly sealed, that’s the air your family breathes every day.
For many older Toronto-area homes, a crawl space sits below the main floor: often forgotten until something goes wrong. Crawl space encapsulation is one of the most effective ways to control moisture at the source and improve long-term indoor air quality.
What Is a Crawl Space Encapsulation?
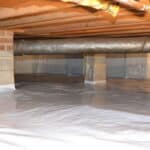
Crawl space encapsulation is a full moisture-control system that seals your crawl space from the ground up.
The process usually includes sealing crawl space vents, installing a heavy-duty vapour barrier across the floor and walls, and adding a dehumidifier to maintain safe humidity levels year-round.
The goal is to completely separate the crawl space from the damp soil beneath it and from the outside air: two major sources of moisture that cause real damage over time.
If your crawl space is damp, smells stale, shows condensation on pipes or wood, or has signs of mould and pest activity, encapsulation addresses all of those problems at once rather than treating each symptom separately.
For homes with a more serious situation, such as a wet or actively flooding crawl space, encapsulation is often part of a larger solution that includes proper basement waterproofing.
What it solves
Moisture underneath your home creates a chain reaction of problems. Sealing the crawl space vent, installing an airtight vapour barrier system, and adding a dehumidifier can significantly reduce humidity levels and cut the risk of mould, mildew, termites, odours, dust mites, and general poor indoor air quality.
Health Canada recommends keeping indoor relative humidity between 30% and 50% to prevent mould growth: a target that’s hard to hit when damp soil sits open under your home.
Specific problems that crawl space encapsulation solves:
- Musty odours and persistent dampness that work their way up into living areas
- Mould and mildew growth on floor joists, insulation, and subflooring
- Wood rot and long-term structural damage caused by repeated moisture exposure
- Condensation on pipes and HVAC equipment tucked into the crawl space
- Insects and rodents entering through gaps in the foundation perimeter
The main problem that crawl space encapsulation solves is rising moist air upstairs, which makes your home feel uncomfortable and harder to heat or cool efficiently.
Benefits of crawl space encapsulation
Properly done crawl space encapsulation provides protection you’ll notice immediately and over the long run. Here’s what changes once the space is sealed:
- Odours go away. That damp, earthy smell drifts up through floors and into rooms. Once the moisture source is cut off, it simply stops.
- Wood framing lasts longer. Joists and beams that stay dry last decades longer than those that cycle through wet-dry periods every year. In the Toronto area, where spring thaws and heavy rain are routine, that matters.
- Lower heating and cooling bills. A crawl space open to cold, humid outside air forces your HVAC to work harder. Sealing it reduces drafts and helps stabilize temperatures in the rooms above.
- Fewer pests. Encapsulation closes off the gaps and entry points that insects and rodents use to get under your home.
- Better resale value. A dry, clean crawl space is a selling point. A buyer’s inspector finding mould and rotted joists is not.
Most homeowners notice the difference in smell first, within days of the job being done. The structural and energy benefits show up over months and years, but they add up.
Is Encapsulation Right For Me?
Encapsulation works well for homes with moisture issues in the crawl space, but it’s not always the right first step on its own. A few things to check before moving forward:
Water intrusion
If water is pooling in your crawl space after rain or snowmelt, drainage needs to be addressed first. Encapsulating overactive water entry traps moisture inside rather than sealing it out.
Ventilation and combustion appliances
Homes with gas furnaces or water heaters in or near the crawl space need to have proper ventilation confirmed before sealing the area. A qualified contractor should assess backdrafting risk.
Termite treatments
If your home has an active termite bond, consult your pest control provider before encapsulating: some treatment plans require access to the soil.
Once those factors are sorted, encapsulation is a straightforward and long-lasting solution for moisture control.
What a Full Crawl Space Encapsulation Includes
A complete crawl space encapsulation system has three working parts. Each one targets a different source of moisture, and skipping any one of them limits how well the others perform. The table below breaks down what each component does and why it’s included.
| Component | What It Does | Why It Matters |
| Vent sealing | Blocks outside humid air from entering the crawl space | Outdoor air is the primary source of summer moisture buildup under the floor |
| Vapour barrier (12–20 mil liner) | Covers the ground and walls to prevent soil moisture from evaporating upward | Bare soil continuously releases moisture, even when the surface looks dry |
| Crawl space dehumidifier | Actively removes residual humidity from the sealed space | A sealed space traps whatever moisture remains; the dehumidifier keeps levels within the safe 30–50% range |
Most encapsulation jobs also include sealing around posts, pipes, and rim joists, anything that breaks the liner and could let soil air back in. The three components above work together as a system; each depends on the others to hold up over the long term.
Ways to Prevent a Leaky and Musty-Smelling Crawl Space
Keeping a crawl space dry comes down to cutting off three things: outside humid air, ground moisture, and whatever residual humidity builds up inside once it’s sealed. Each step below targets one of those sources. Done in the right order, they work together as a complete system.
Seal crawl space vent
Traditional construction called for vented crawl spaces: the idea being that outside air would carry moisture away. In practice, the opposite happens. Humid outdoor air flows in during warmer months, hits the cooler surfaces inside the crawl space, and condenses. Sealing those vents is the first step in encapsulation, cutting off that moisture source completely.
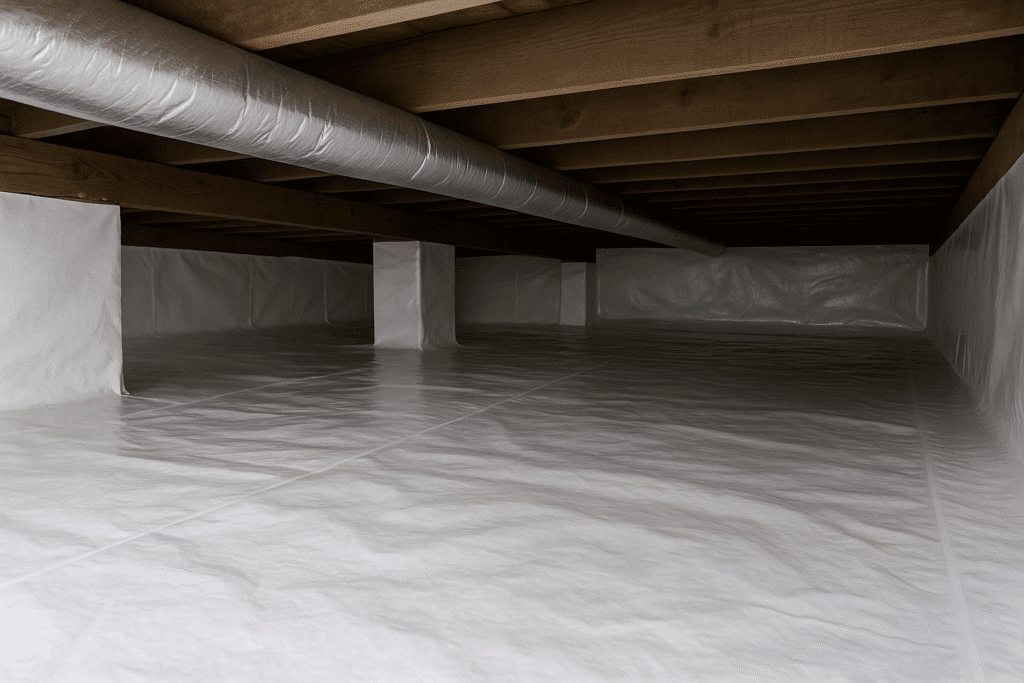
Install an airtight vapour barrier system
The vapour barrier is the centrepiece of any encapsulation job. A reinforced polyethylene liner, usually 12 to 20 mil thick, is laid across the entire crawl space floor and sealed up the walls, over the rim joists, and around posts and pipes.
The liner needs to be sealed at every seam and penetration with tape and mechanical fasteners. A vapour barrier that’s loosely laid without proper sealing has gaps where moist soil air can still get in. The difference between a proper installation and a sloppy one shows up a few years later.
Install a dehumidifier to reduce moisture
A sealed crawl space still traps whatever humidity remains inside. A crawl-space-rated dehumidifier, designed to operate at lower temperatures than standard household units, pulls that residual moisture out and keeps relative humidity within safe limits year-round.
Some dehumidifiers drain passively to a sump pit; others require a condensate pump. Either way, the unit should be sized to the space’s square footage and include a humidity controller.
Other ways
In some cases, crawl space moisture problems connect to broader drainage and foundation issues. The following services from WillFix can apply to these projects alongside encapsulation:
- Sump pump installation: A pit collects water that accumulates, and the pump moves it out of the home before it spreads.
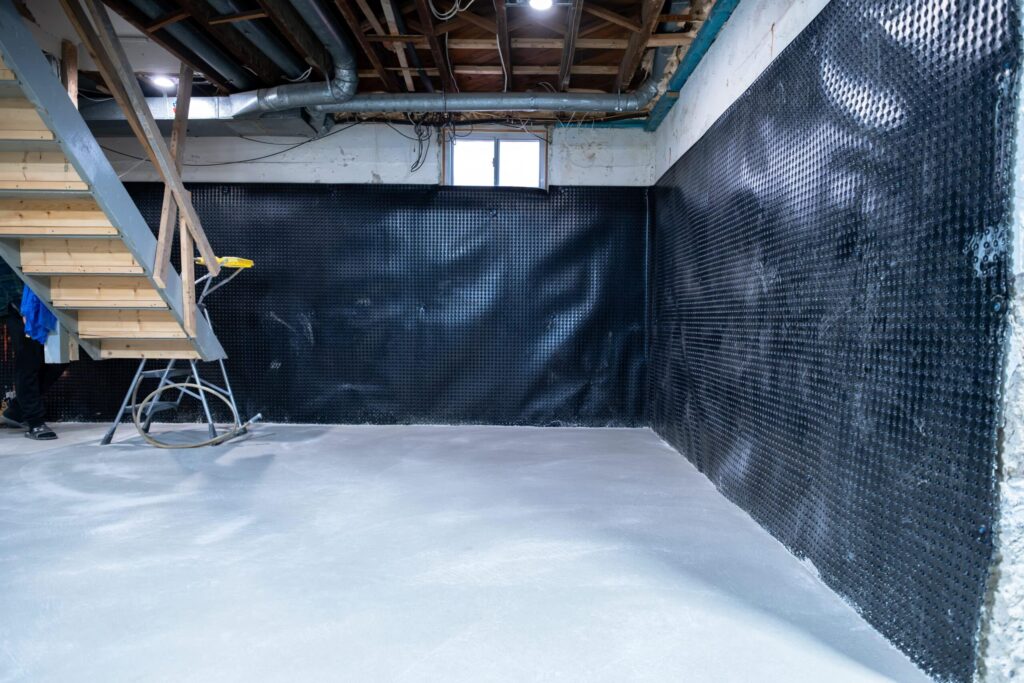
- Drainage system installation: Weeping tiles and French drains channel groundwater away from your foundation, preventing it from reaching the crawl space floor.
- Foundation crack repair: Crawl space walls can crack just like basement walls. Cracks should be addressed before sealing the area; otherwise, moisture will continue to enter through those points.
- Structural repairs: Sagging floors, deteriorating support posts, and damaged beams may need attention before or alongside encapsulation. Our team handles beam replacement, floor levelling, and related structural work as part of the same project when needed.
If you’re considering converting your crawl space into usable space rather than just sealing it, read our guide on crawl space to basement conversion: it covers the full excavation and underpinning process.
Crawl Space Encapsulation Cost in Toronto 2026
Encapsulation pricing in the Toronto area varies widely depending on the condition of the space and the job requirements. Key factors that affect the final cost:
- Square footage and access: A tight, low crawl space takes longer and costs more per square foot than one with good clearance
- Active water intrusion: If drainage work or a sump pump is needed first, that adds to the scope
- Dehumidifier sizing: Whether a dehumidifier is part of the package, and what capacity is needed for the space
- Condition of existing materials: Rotted wood, damaged insulation, or heavy debris all need to be dealt with before the barrier goes in
- Complexity of the layout: Tight corners, multiple support posts, and lots of pipe penetrations add time to the vapour barrier installation
Because these variables vary by home, pricing is best confirmed through an on-site assessment. WillFix offers free consultations: no obligation, just an honest look at what the job involves and what it will cost. Financing options are also available for larger projects.
Thus, crawl space encapsulation in Toronto and the GTA usually runs between $5,000 and $15,000+, depending on size and scope, with larger or more complex jobs running higher.
Conclusion
A damp crawl space doesn’t stay a crawl space problem for long. Moisture migrates up into floors, walls, and eventually the air your family breathes. Crawl space encapsulation, done properly with sealed vents, a fully taped vapour barrier, and a dehumidifier matched to the space, stops that process at the source.
If your home has a crawl space and you’ve noticed musty smells, soft spots in the floor, or higher humidity levels than expected, it’s worth getting eyes on what’s happening underneath. Contact WillFix for a free crawl space assessment, and we’ll tell you exactly what you’re dealing with and what it will take to fix it.